Kitchen Science Experiments: Fun with Mixtures!
Making marvelous mixtures is a fun way for children to take an active role in discovery. It’s often messy and always a lot of fun! Mixing (and unmixing) can build scientific skills and encourage problem solving. Little scientists explore the big ideas when they mix it up.
-
Some mixtures can be “unmixed” and others can’t.
Next time your scientist’s room is an absolute mess, use the clean up as an opportunity to explore unmixing. A pile of blocks, plastic animals, and puzzle pieces is really just a mixture. Thankfully, it’s a mixture that can be separated relatively easily into its parts! Unmixing is also a great way for children to practice their sorting and fine motor skills. Compare these types of mixtures with the ones made by stirring chocolate into their milk in the morning, adding bubble bath to the tub, or stirring red and blue paint to make purple. Can these be unmixed? -
How you mix can make a big difference.
Swirl. Shake. Mixing doesn’t have to be in a bowl with a spoon. Take some heavy cream and pinch of salt. Mix it with a spoon and you’ll get slightly salty cream. Add the same ingredients to a mason jar, shake them for a while, and you’ll get butter! Crush peanuts and honey together (or stick them in the food processor) and you get a delicious peanut butter mixture. Stir those same peanuts and honey together and all you get are sticky (but still delicious) peanuts. Try mixing by sifting, smashing, and spinning and see how it changes your mixtures. -
Sometimes the order in which you mix things can make a difference.
Cooking and baking with your child is the best way to explore mixtures! Not only is this a delicious way to see how different mixtures come together, but it also gives you the chance to talk about following directions and what can happen if you don’t add the right amounts at the right time. Talking through what you do first, second, third, and so on in a recipe helps your scientist practice a very important skill while making something tasty!
Here are some mixing experiments you can conduct with your young scientists at home in your kitchen or outside!
Mixing and Unmixing Colors
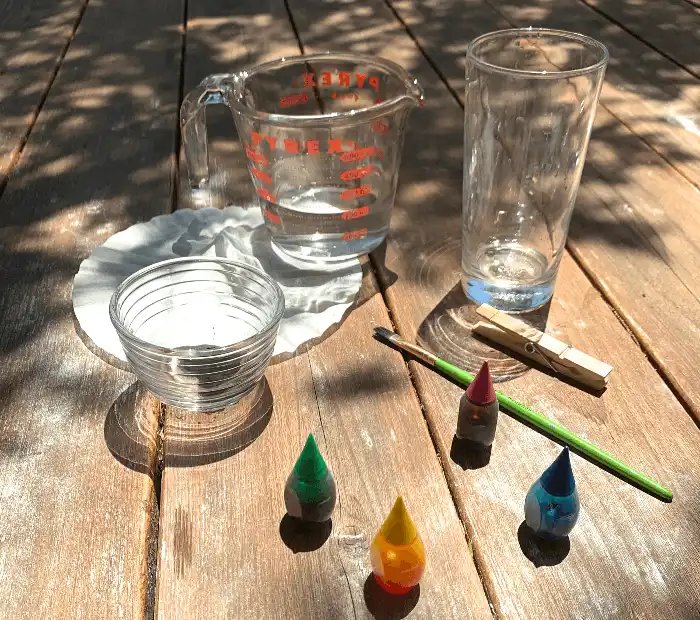
Supplies Needed:
Paper Coffee filters
Paint brush
Water
Clothespin or paper clip
Tall glass
Small bowl or dish
Instructions:
- Choose three colors of food coloring. Add 3 drops of each color to the small bowl. Mix them up.
Exploration Questions: How does the mixture of colors look different when you add each color? Can you see the different colors clearly when you mix them up? Can you take any colors back out again? Hold your mixture up to the light or shine a light into it. Does the extra light make your mixture look different?
- Cut a strip out of the center of the coffee filter. Use your food coloring mixture to paint a horizontal line across the strip towards the center of the strip (not too close to either end).
Exploration Questions: What color(s) do you see when you paint the mixture on the strip of filter paper? Can you see any of the individual colors you added to the bowl?
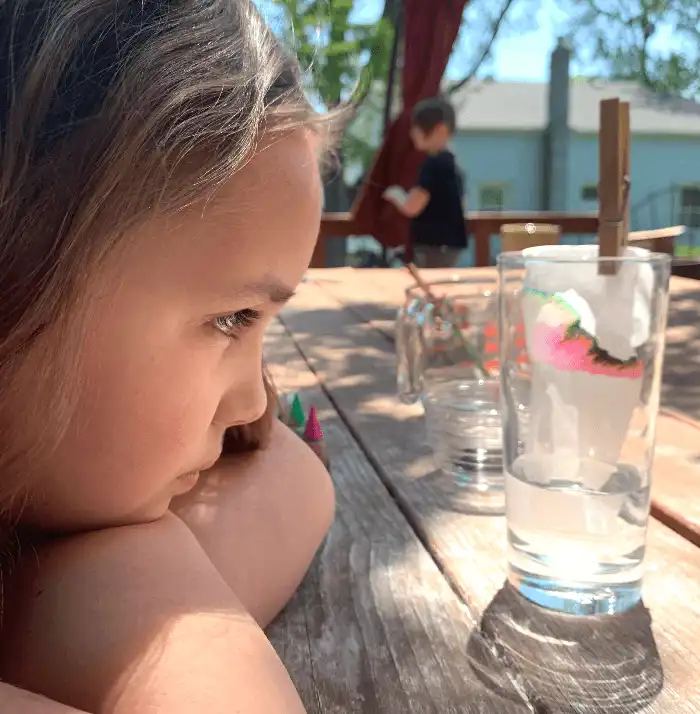
- Fill your tall glass about halfway up with water. Lower your strip into the water, making sure that the line you painted is not under the water. Use the clothespin or paper clip to keep the strip from falling into the water. Watch closely and check back a lot.
Exploration Questions: Can you see the water being “sucked up” by the filter paper? What happens when the water reaches the line you painted? Leave your experiment and come back in 2 minutes. How does it look different? Leave your experiment for 15 minutes. How does it look now?
Why did that happen? The water travels up the filter paper and when it reaches the ink it starts to dissolve the pigments from the food coloring. As the water continues up the paper, it takes the pigments with it. Different pigments dissolve in different ways and at different rates. Some colors separate out very quickly and travel faster up the paper while others can be seen moving more slowly or “staying behind” on the paper.
Mixing and Unmixing Salt Water
Supplies needed:
½ cup of Epsom Salts (Please note: You can use any salt, such as table salt or kosher salt, but you may need to up the percentage. Epsom salt gives the best crystallized patterns!)
½ cup of warm water in a bowl
Spoon
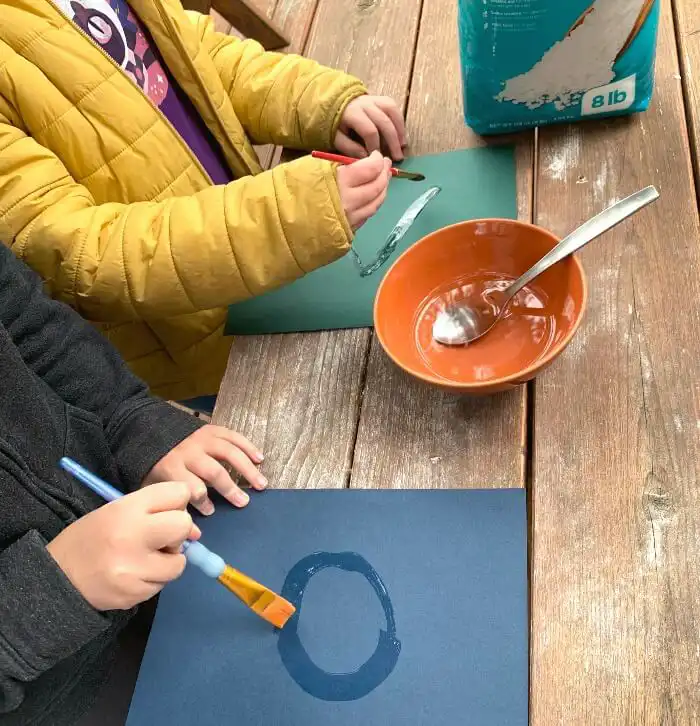
Dark colored paper (cardstock or printer paper works better than construction paper)
Paintbrush
Instructions:
- Add the Epsom Salt to the warm water and stir until the salt is dissolved.
Exploration Questions: What happened right when you added the salt to the water? DId the water look clear or cloudy? How long did it take for the salt to dissolve (or disappear) in the water? Can you take the salt back out after it dissolves?
- Using your salt and water mixture, paint a picture on your dark colored paper. Keep stirring the mixture with your paint brush as you paint. Let your painting dry.
Exploration Questions: What does your painting look like as you’re spreading the mixture on it? How does it feel? Does the mixture look clear on your paintbrush? Check on your painting after a few minutes. How has it changed? Does it feel different? Let your painting dry completely. What does it look like now? Do you notice any new shapes and colors left behind by your mixture? How does it feel now?
-----
As you can see, exploring mixing colors as a science experiment at home can be fun and educational.
Share your color mixing science experiment photos or videos with us on social media, tag us on Facebook or Instagram.
If your students love mixing things up, they will enjoy these books about mixing:
- Mix it Up! by Herve Tullet
- Stir Crack Whisk Bake: A Little Book about Little Cakes by Maddie Frost
- Splatter by Diane Alber
- Cement Mixer's ABC: Goodnight, Goodnight, Construction Site by Sherri Duskey Rinker
Want to learn even more Kitchen Science Color Mixing Experiments? Check out this video demonstration on our YouTube channel:
Check out the kitchen science experiment blog articles about Fun with Water, Fun with Bubbles and Fun with Light and Shadows.
What kitchen science experiments do you like best?
 Hollie is certified K-8 teacher who has been educating in the informal education field since 2005. She has developed and implemented countless exciting STEAM programs for families, classrooms, and teachers focused on the natural world, the scientific process, and ancient life. Her professional passions are inquiry, whole family learning, experiential learning starting in early childhood, and the intersection of literacy and science instruction.
She has recently developed a community-based program that encourages families to use dramatic play to learn science, increase literacy skills, and have fun together for which she received the Drexel University Presidential Award for Civic Engagement. She is most proud of her work on a popular science storytelling program for preschool families and classrooms that combines a book club format with engaging programs, innovative curriculum, and a hysterical puppet storyteller.