Kitchen Science: Light Science Experiments
Light Science Activities for Preschoolers

Playing with light and shadows can help your little scientist not only begin to understand concepts of light, but also encourage math and language skills, and even help younger children deal with common fears!
-
Measuring with Shadows
Measuring can be a tricky skill for children to master, but shadows allow younger children to think critically about length comparisons long before they even pick up a ruler. Compare the height of a small tree or flower to its shadow. Are they the same size? Does the comparison change depending on the time of day? Hold your hands up to a flashlight. Do grown-up fingers cast shadows that are longer than kiddo finger shadows? By moving the flashlight, can you make the shadows longer or shorter? Try measuring shadows with unconventional measuring tools. How many blocks long is your shadow? In the morning, the shadow from a parking meter might be as long as your favorite action figure. Is it longer or shorter than the same action figure in the afternoon?-
Imagining with Shadows
Who hasn’t made a shadow dog or butterfly with a flashlight on the wall? Your shadow makes the perfect character in a story your family can write together. Add a funny hat and now your shadow is a monster in the story. Wrap pipe cleaners around your fingers and you have an alien with cool antennae. Paper shadow puppets are easy to make--trace your favorite characters from your bedtime stories--and don’t require a high level of dexterity to master. Use shadows to tell great adventure stories with the special bedtime bonus that the lights are already low for sleeping!-
Scares and Shadows
Shadows can sometimes be scary to young children. Spending more time exploring shadows during the safety of daytime with flashlights and sunshine can help make conversations about nighttime scaries a little easier. Reminding children that they can control the size and shapes of shadows with light may give them peace of mind.
Here are some light and shadow experiments you can conduct with your young scientists at home in your kitchen or outside!

Paint Shadows
Supplies needed:
A sheet of paper (copy paper, construction paper, cardstock--any works)
Washable kid-safe paint
Spray bottle, large paintbrush, or toothbrush.
Water
Instructions:
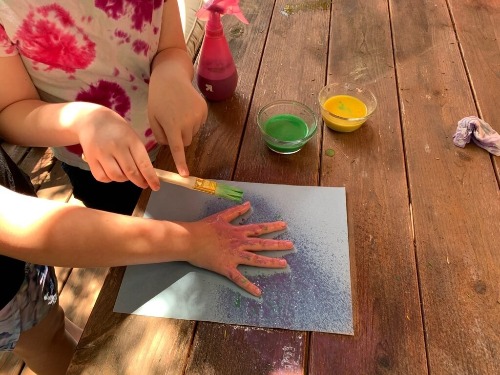
- Water down your paint so that it is easily sprayed, splattered or dripped. Pour it into your spray bottle. If you don’t have a spray bottle, you can use a paint brush to splatter or drip paint onto your paper. You can also dip your (unused!) toothbrush into the thinned paint and use your thumb to flick paint onto the paper.
- Place your hand flat on a piece of paper. Spread your fingers wide. Keeping your hand flat, spray, drip and splatter the paint onto the paper--and your hand!
Exploration Questions: How does it feel when the paint splatters on your hand? Make a prediction; what will your painting look like when you remove your hand?
- Remove your hand from the paper and admire your artwork.
Exploration Questions: What does your painting look like? Why is there paint on some parts of your painting and not on others? How is your painting like a shadow on a sunny day? (The paint is like light from the sun. Your hand blocked the paint from reaching the paper in the same way it would block sunlight. The outline of your hand on the paper is just like a shadow left behind!)

Easy DIY Sundial
Supplies needed:
Paper plate
Markers, crayons, colored pencils
Pencil
Rock or paperweight
Watch (or phone)
Clay or playdough to attach the pencil to the plate. (You can also use tape to secure the pencil, but it requires a little more patience!)
Instructions:
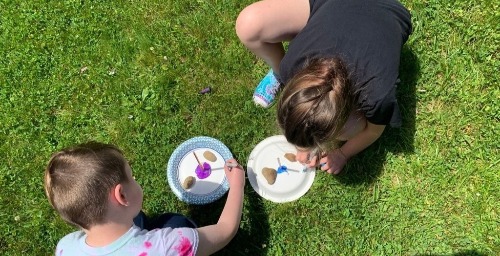
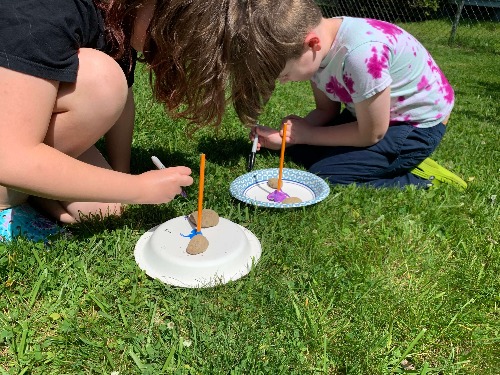
- Attach the pencil to the center of your plate like a flagpole.
Tips:
- If you’re using clay to keep your pencil upright, you can attach it easily to the plate face up or upside down. Choose the side that will be easiest to write on with the markers, crayons, or pencils you have on hand and attach the pencil to that side.
- If you’re attaching the pencil with tape, poke a hole in the center of the plate and turn it upside down on the table. Push the pencil through until it touches the table. Use the tape to attach the pencil to the plate to keep it from falling over.
- Bring your plate and pencil outside. Place it in the sun and hold it down with the rock or paperweight. Make sure it’s in a place that stays sunny most of the day. Mark where the shadow from the pencil is pointing on your plate with the time. Leave your sundial outside and come back in an hour. What happened? Mark the new shadow cast by the pencil with the time. Do this process a few more times. What did you notice?
Exploration Questions: If you didn’t have a clock or a phone, how could you tell what time of day it was? How do we know what time it is? What only happens in the morning? What only happens at night?
- Leave your sundial outside overnight. Go back the next day around the same time. Where is the shadow pointing? Can you predict where it will point later in the day?
Why did that happen? A sundial is one of the oldest ways of telling time! It has two main parts: the dial face or dial plate (your paper plate in this experiment) and a gnomon (the pencil in your experiment). The gnomon casts a shadow on the dial plate depending on where the sun is in the sky. As the day passes and the sun moves across the sky, the position of the shadow changes. The dial plate has markings on it to help match the position of the shadow to the time.
-----
As you can see, exploring light and shadows as a science experiment at home can be fun and educational.
Share your light and shadow science experiment photos or videos with us on social media, tag us on Facebook or Instagram.
If your students love light and shadow experiments, they will enjoy these books about light and shadows:
- Tiny T. Rex and the Very Dark Dark by Jonathan Stutzman
- Yeti, Turn Out the Light! by Greg Long
- The Black Rabbit by Philippa Leathers
- Secrets of the Seashore (Shine-A-Light Book) by Carron Brown and Alyssa Nassner
Want to learn even more Kitchen Science Water Experiments? Check out this video demonstration on our YouTube channel:
Check out more kitchen science experiment blog articles about Fun with Bubbles, Fun with Color Mixing, and Fun with Water.
What kitchen science experiments do you like best?
 Hollie is certified K-8 teacher who has been educating in the informal education field since 2005. She has developed and implemented countless exciting STEAM programs for families, classrooms, and teachers focused on the natural world, the scientific process, and ancient life. Her professional passions are inquiry, whole family learning, experiential learning starting in early childhood, and the intersection of literacy and science instruction.
She has recently developed a community-based program that encourages families to use dramatic play to learn science, increase literacy skills, and have fun together for which she received the Drexel University Presidential Award for Civic Engagement. She is most proud of her work on a popular science storytelling program for preschool families and classrooms that combines a book club format with engaging programs, innovative curriculum, and a hysterical puppet storyteller.
