Kitchen Snowman
Indoor Snowman Activities for Preschoolers
A kitchen snowman is fun to make and won’t melt! Invite families to contribute reusable items from the kitchen to accessorize the snowman. This is designed to be a group project. Expect toddlers to wander in and out of participation. The most fun part is scrunching up the newspapers to fill the snowman’s body!
Ages/Grades:
Toddlers/Preschool
Learning Domains:
Perceptual, Motor, and Physical Development; Approaches to Learning
Materials Needed:
White tall kitchen trash bags – 3 bags (13-gallon size)
Strong tape (postal or masking tape)
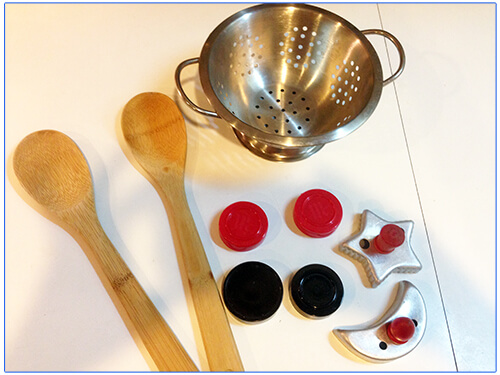
Kitchen tools and recycled items (such as large plastic lids from empty jars)
Newspapers
Preparation:
Collect kitchen items that can be used to accessorize your snowman. Look for items that are light enough to be taped to the snowman’s body. Talk to the children about the parts of a snowman (3 round shapes sized from big to small), eyes, nose, mouth, buttons, etc.
Activity:
Start with 3 white bags that will be made into the snowman’s body. Invite children to scrunch and stuff newspapers inside the bags to make big, medium, and small sized “snowballs.”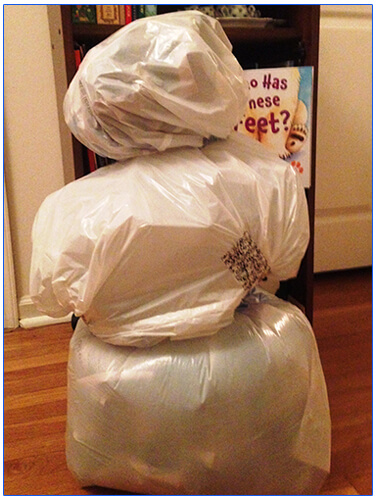
Build the snowman by attaching the 3 stuffed bags together with tape. Discuss where to attach all the accessories. Be prepared to use lots of tape! Make up your own snowman song to celebrate your creation!
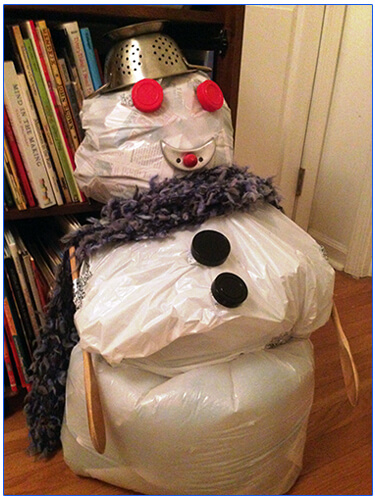
Cookie the Snowman,
Was a jolly happy kid;
With a cookie cutter mouth and a missing nose,
And two eyes made out of lids . . .
Cookie the snowman has wooden spoon arms, spice lid eyes, a colander hat, a cookie cutter mouth and buttons made from jar lids.